Understanding the JupyterLab Interface
After the server starts, Sandbox opens JupyterLab. The interface has several areas for managing files and running geospatial analysis.
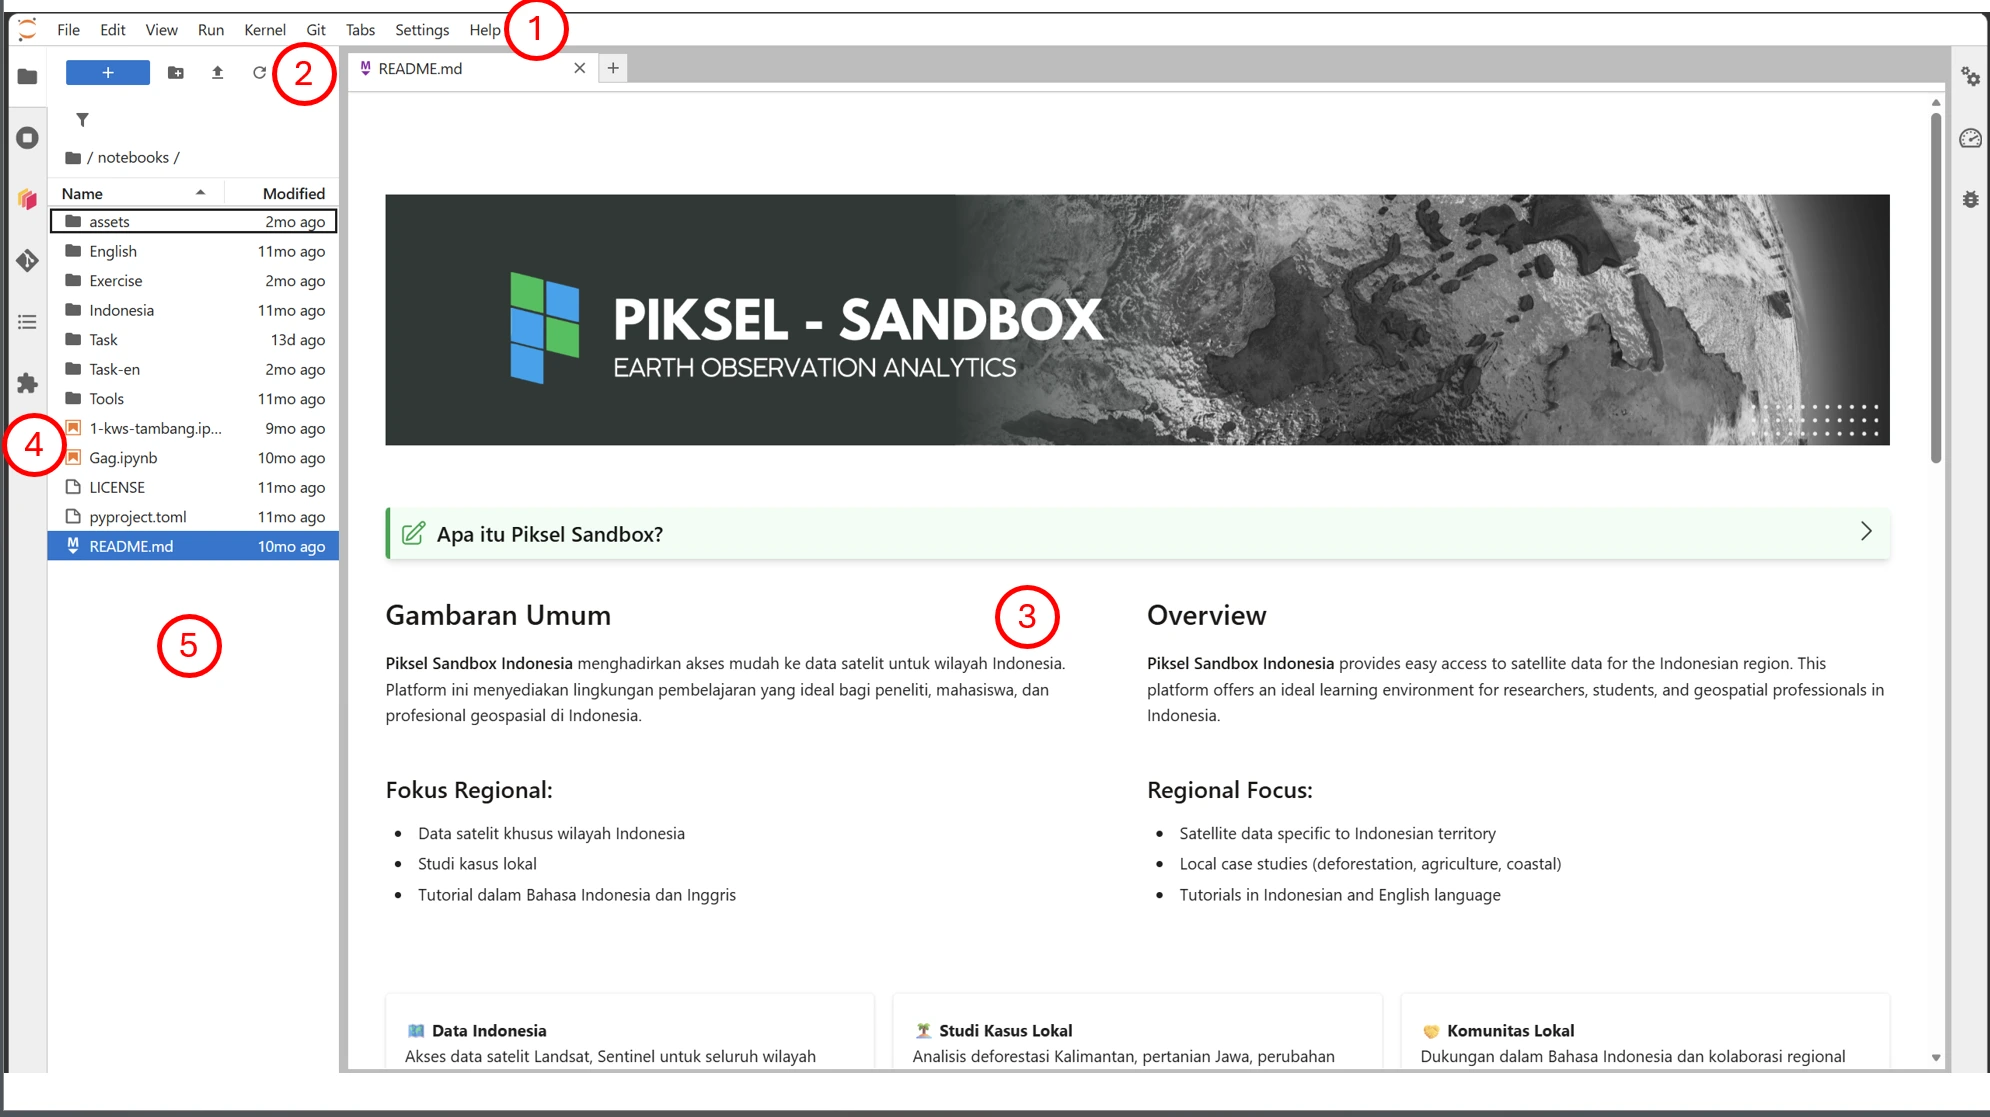
Menu Bar
The Menu Bar sits at the top of the page. It is where users create and save files, edit notebooks, run code, manage kernels, change the display, and open documentation.
The available menus are:
- File manages files and folders.
- Edit changes the contents of notebooks and documents.
- View changes the interface display.
- Run runs notebook cells.
- Kernel manages the Python kernel.
- Git manages Git repositories when available.
- Tabs manages open tabs.
- Settings changes JupyterLab configuration.
- Help opens documentation and help resources.
Toolbar
The Toolbar provides quick access to common actions without opening a menu.
It includes:
- New Launcher (+) to create a notebook or open the launcher.
- New Folder to create a folder.
- Upload Files to upload files from a computer.
- Refresh to refresh the File Browser.
Workspace
The Workspace is the main area where files are opened and displayed.
In the example, README.md is open. The Workspace can also open:
- Jupyter Notebooks (
.ipynb) - Python scripts (
.py) - CSV files
- Raster and vector datasets
- Images
- Other documents
Several files can be open at the same time in separate tabs.
File Browser
The File Browser shows the folders and files in a user’s workspace.
It can be used to:
- Open project folders.
- Open notebooks.
- Access datasets.
- Manage files and directories.
- Delete or rename files.
Sidebar
The Sidebar contains the File Browser and the list of folders and files in the workspace. It is the main place for managing the resources used in JupyterLab.
The panel can be hidden or shown again with the File Browser icon on the left side of the application when more workspace is needed.